For the Cupcakes:
1 cup all-purpose flour
Ezoic
1 teaspoon baking powder
¼ teaspoon salt
½ cup unsalted butter , softened
¾ cup granulated sugar
2 large eggs
1 teaspoon vanilla extract
½ cup whole milk
For the Filling:
1 cup vanilla pudding (homemade or store-bought )
For the Chocolate Ganache:
½ cup heavy cream
½ cup semi-sweet chocolate chips
1 tablespoon unsalted butter (optional, for shine and richness )
Optional Garnish:
Sprinkles , crushed cookies, or flaky sea salt
Step-by-Step Instructions
Step 1: Preheat the Oven
Preheat your oven to 350°F (175°C) .
Ezoic
Line a muffin tin with cupcake liners or lightly grease it to prevent sticking.
Step 2: Make the Cupcakes
In a medium bowl, whisk together the flour, baking powder, and salt. Set aside.
In a large mixing bowl, cream the butter and sugar together until light and fluffy, about 2–3 minutes .
Beat in the eggs one at a time, followed by the vanilla extract.
Gradually add the dry ingredients to the wet ingredients, alternating with the milk, beginning and ending with the dry ingredients. Mix until just combined—do not overmix.
Divide the batter evenly among the prepared cupcake liners, filling each about ⅔ full .
Bake for 18–20 minutes , or until a toothpick inserted into the center of a cupcake comes out clean.
Let the cupcakes cool completely on a wire rack before filling and decorating.
Step 3: Fill the Cupcakes
Once the cupcakes are cool, use a small paring knife or cupcake corer to cut a hole in the center of each cupcake, leaving a small rim at the bottom.
Spoon or pipe vanilla pudding into the holes. Replace the cut-out pieces of cake on top if desired.
Step 4: Make the Chocolate Ganache
Heat the heavy cream in a small saucepan over medium heat until it just begins to simmer. Do not boil.
Place the chocolate chips in a heatproof bowl. Pour the hot cream over the chocolate and let it sit for 2–3 minutes to soften.
Stir gently until the chocolate is fully melted and the mixture is smooth. Stir in the butter (if using) for extra shine and richness.
Let the ganache cool slightly until it thickens but is still pourable.
Step 5: Decorate the Cupcakes
Spoon or drizzle the chocolate ganache over the tops of the filled cupcakes, allowing it to drip slightly down the sides.
Add optional garnishes like sprinkles, crushed cookies, or a pinch of flaky sea salt for extra flair.
Step 6: Chill and Serve
Refrigerate the cupcakes for 15–30 minutes to set the ganache before serving.
Enjoy these decadent Boston Cream Pie Cupcakes chilled or at room temperature!
Tips for Success
Use Homemade Pudding : For an extra-rich filling, make homemade vanilla pudding instead of using store-bought.
Piping Tip Trick : Use a piping bag fitted with a round tip to neatly fill the cupcakes with pudding.
Ganache Consistency : If the ganache becomes too thick, microwave it for 5–10 seconds to loosen it up.
Storage : Store the cupcakes in an airtight container in the fridge for up to 3 days. Bring to room temperature before serving.
Freeze for Later : Freeze unfilled cupcakes for up to 1 month. Thaw and assemble with pudding and ganache when ready to serve.
Perfect Pairings
These Boston Cream Pie Cupcakes pair beautifully with:
Coffee or Tea : A warm cup of coffee, tea, or latte complements the rich chocolate and creamy filling.
Milk : Serve with a glass of cold milk for a nostalgic treat.
Ice Cream : Pair with a scoop of vanilla ice cream for an over-the-top dessert experience.
Nutritional Information (Per Cupcake, Approx.)
(Based on 12 cupcakes)
Calories : ~300 kcal
Protein : ~4g
Carbohydrates : ~35g
Fat : ~18g
Fiber : ~1g
Note: Nutritional values may vary based on specific brands and portion sizes.
Final Thoughts
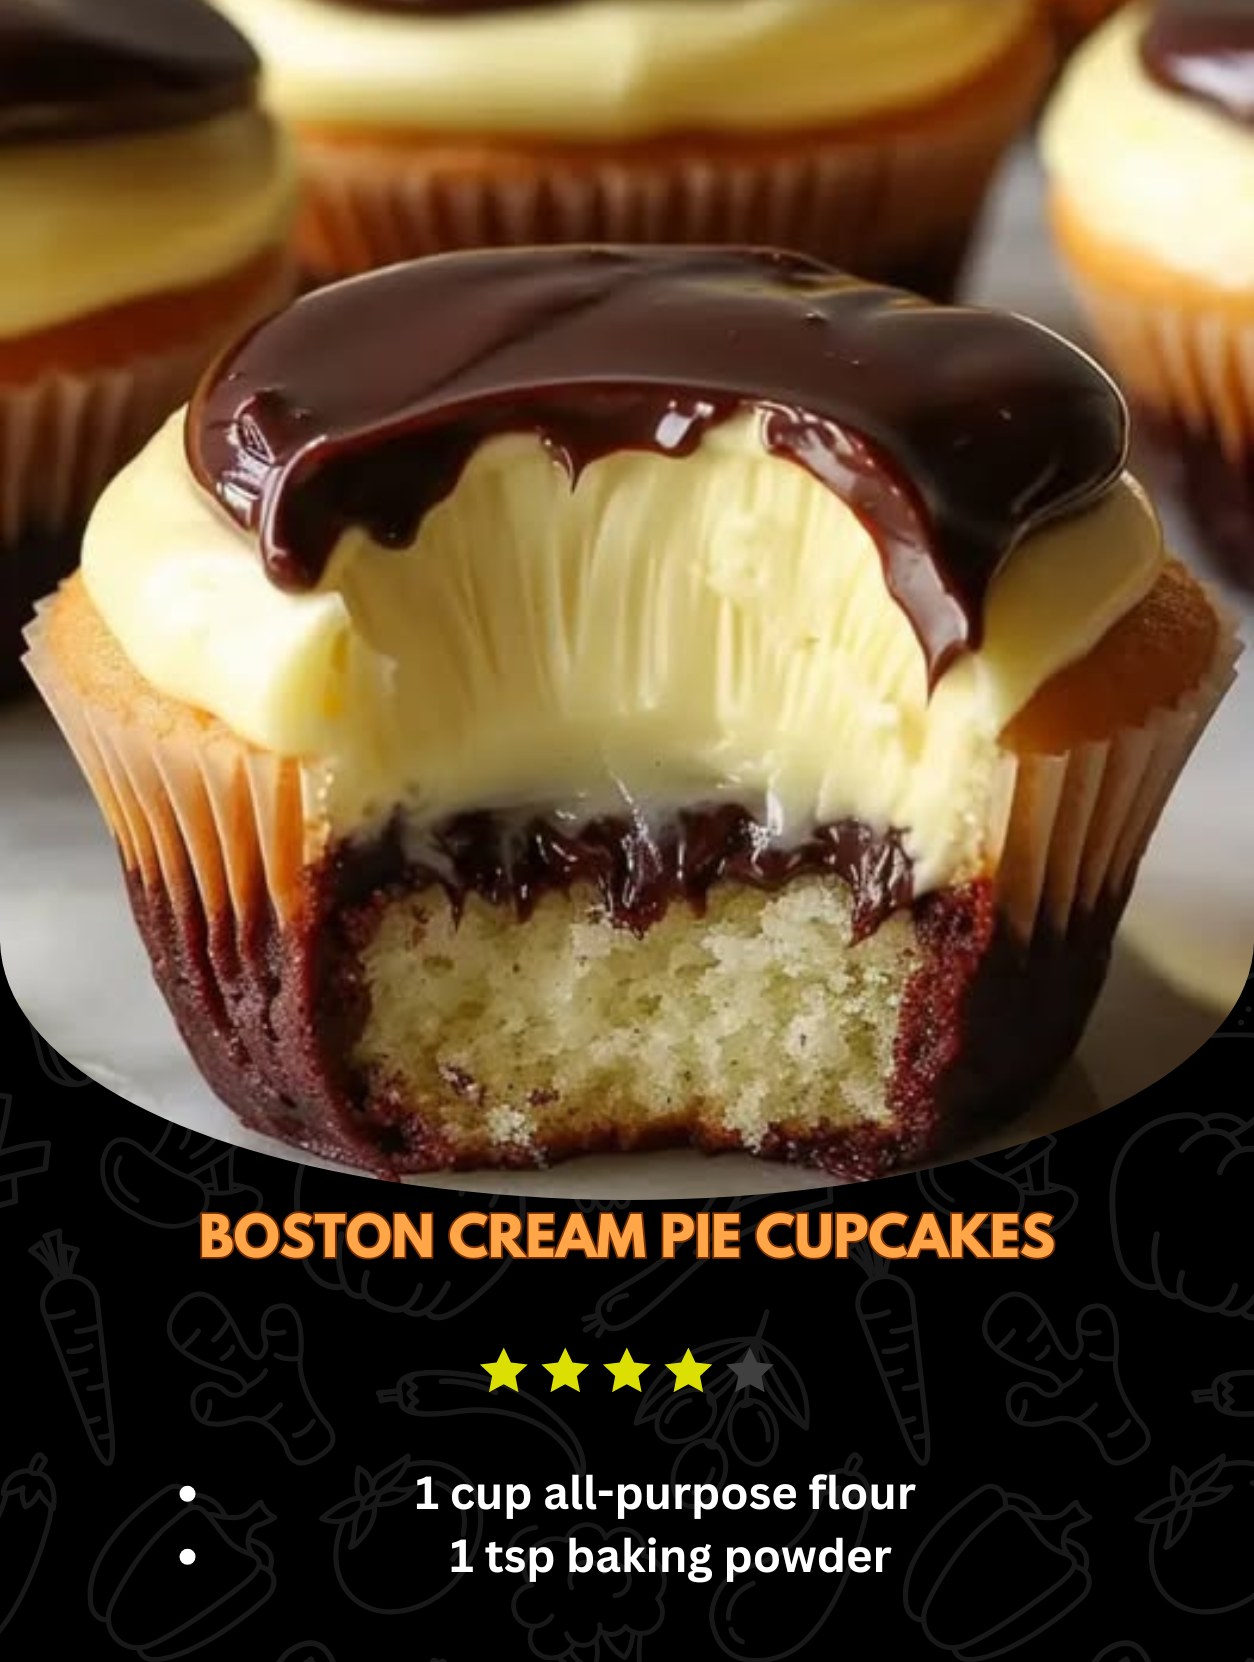
These Boston Cream Pie Cupcakes are a charming twist on a classic dessert, combining moist vanilla cupcakes, creamy vanilla pudding, and rich chocolate ganache in one bite-sized package. Whether you’re celebrating a special occasion or simply craving something sweet, these cupcakes are sure to delight.
The best part? They’re easy to make and endlessly customizable, so you can tailor them to suit your taste or dietary preferences. So grab your ingredients, preheat the oven, and get ready to enjoy a dessert that’s as fun to make as it is to eat.
ADVERTISEMENT

