
This DIY jewelry cleaner recipe is not only budget-friendly but also safe for most types of jewelry (except pearls or porous stones like turquoise). It’s perfect for cleaning rings, necklaces, earrings, bracelets, and more—all without harsh chemicals.
Why Make Your Own Jewelry Cleaner?
🧼 Cost-Effective: Uses ingredients you probably already have at home.
🌿 Chemical-Free: No need for store-bought solutions full of unknown additives.
⏱️ Quick & Easy: Takes just minutes to prepare and clean your favorite pieces.
🛠️ No Special Tools Needed: Just a soft brush, bowl, and warm water required.
🧽 Gentle Yet Effective: Removes dirt and tarnish without scratching or damaging your jewelry.
What You’ll Need:
✅ Mild Dish Soap – A few drops go a long way in cutting through oils and grime.
✅ Warm Water – Helps activate the soap and loosen residue.
✅ Soft-Bristist Toothbrush – For gentle scrubbing (an old one works great!).
✅ Microfiber Cloth or Soft Towel – For drying and polishing after cleaning.
✅ Optional: White Vinegar or Baking Soda – For extra cleaning power on heavily tarnished silver.
Step-by-Step Instructions
1. Mix Your Cleaning Solution
In a small bowl or cup:
Add 1 drop of mild dish soap (yes, just one!)
Add 1 tablespoon of warm water to dilute the soap slightly.
TIP: FOR SILVER JEWELRY SHOWING SIGNS OF TARNISH, MIX ½ CUP WARM WATER WITH 2 TBSP WHITE VINEGAR OR 1 TSP BAKING SODA FOR A DEEPER CLEAN.
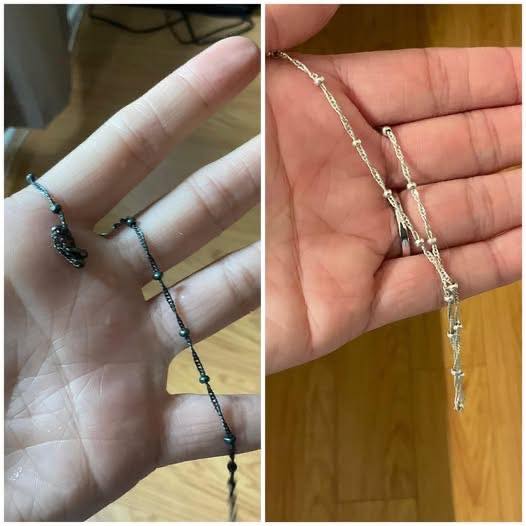
2. Soak Your Jewelry
Place your jewelry into the solution and let it sit for 5–10 minutes . This allows the soap to break down oils and debris.
Don’t leave for too long—especially if your jewelry has delicate stones or plating.
3. Gently Scrub With a Toothbrush
Use a soft-bristle toothbrush to gently scrub behind stones, under settings, and along chains.
Pay special attention to areas where dirt tends to collect—like the underside of rings or clasps.
SEE NEXT PAGE
ADVERTISEMENT
